Cake and Smash Cake: Guide to First Birthday Cakes
Planning your baby’s first birthday? You’ll face a bunch of choices, but picking the cake is honestly one of the most fun. A smash cake is a small, four to six-inch cake made just for your baby to dig into and destroy, while a regular birthday cake is for your guests.
This tradition lets your little one experience their first taste of cake in a totally messy, silly way—think adorable photos, frosting everywhere, and big grins.
So, what kind of cake should you go for? Maybe you want to bake it yourself, or maybe you’ll order from a bakery. Either way, you’ll want to figure out how to set up the perfect smash session.
There’s a lot to consider, from baby-safe ingredients to decorating ideas. Some parents go for sugar-free recipes, others stick with classic vanilla or chocolate.
Rachel's Recipe Pantry contains affiliate links and is a member of the Amazon Services LLC Associates Program. If you make a purchase using one of these Amazon links, we may receive compensation at no extra cost to you. See our Disclosure Policy for more information.
Choosing the Perfect Cake and Smash Cake
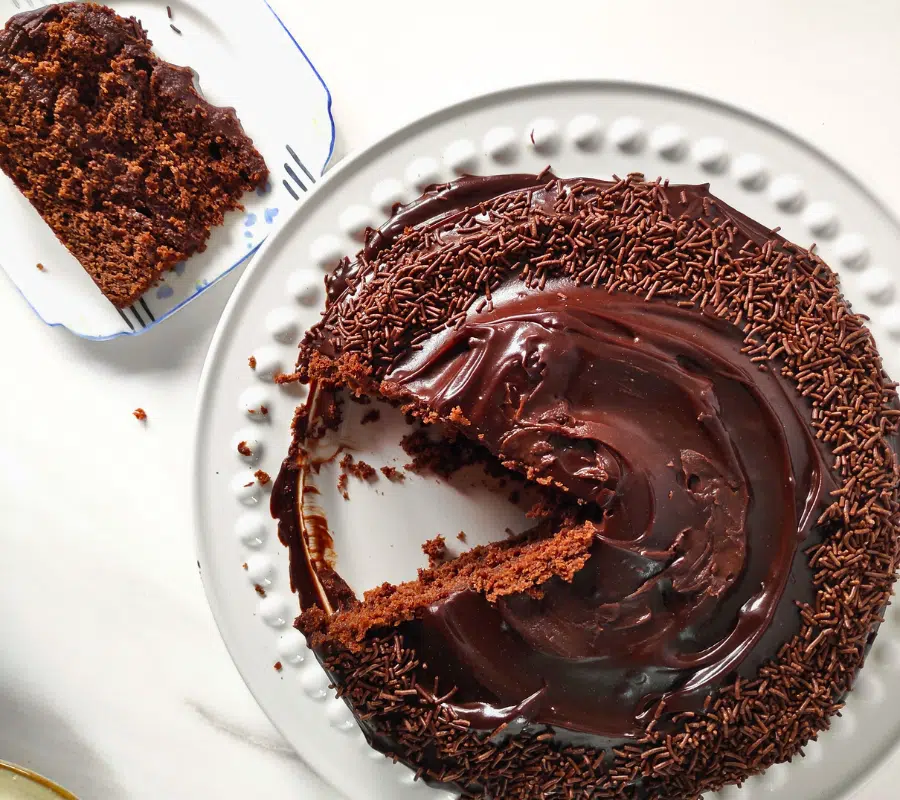
A 6-inch cake seems to work best for most smash sessions. It gives your baby plenty to explore and looks great in photos.
Choosing the right ingredients and paying attention to dietary needs keeps things safe and happy for everyone.
Size and Shape Options
A 6-inch cake with two or three layers is pretty much the standard. It’s enough for your baby to dig into without taking over the whole frame.
If you like something smaller, try a 4-inch or 5-inch cake. These work for tiny babies or if you want a minimalist look. You can even bake individual smash cakes at home using 4-inch pans.
Round cakes are classic, but if you’re feeling creative, go with a heart or star shape to match your theme. Just keep it simple so your baby can get to the good stuff easily.
Selecting the Right Ingredients
Cake flour makes a softer, more tender crumb. Babies can eat and smash it more easily, and it breaks apart nicely for photos.
Want a healthier option? Blanched almond flour brings moisture, healthy fats, and protein. Lots of healthy smash cake recipes use it as the main ingredient.
Skip fondant icing—it’s tough to smash and can be a choking hazard. Buttercream or cream cheese frosting is way better because it’s soft and easy to spread. Bright red or dark brown icing? Not the best for photos, unless you want your baby looking like they’ve been finger painting.
Allergy and Dietary Considerations
Double-check for allergies before picking your cake ingredients—think eggs, dairy, wheat, and nuts. Many bakeries offer egg-free or dairy-free cakes for sensitive babies.
You can ask for alternative flours if your kiddo has grain allergies. Always pull off large sweets or decorations before the smash—babies get enthusiastic, and those can be choking hazards. Even small fondant bits aren’t really safe for chewing.
If you’re not into traditional cake, try something different. Doughnut smashes or fruit smashes look adorable in photos and skip most common allergens.
Smash Cake Recipes and Ideas
A vanilla smash cake with buttercream frosting is a solid choice for most first birthdays. If you want to get creative, healthy options and fun themes like rainbow or unicorn cakes are out there too.
Classic Vanilla Smash Cake
Grab some 4-inch cake pans for the perfect baby-sized layers. The basic recipe uses cake flour, butter, sugar, eggs, and vanilla—nothing fancy.
For three 4-inch layers, mix 79g sifted cake flour with baking powder and a pinch of salt. Cream 57g butter with 100g sugar, then add one egg, some sour cream, and vanilla. Alternate dry ingredients with 80ml milk as you mix.
Bake at 175°C for about 18-22 minutes. For the buttercream, whip 113g butter until pale, then add 180g icing sugar, vanilla, and a splash of milk.
Stack up the layers with buttercream in between. Give it a quick crumb coat and chill before the final layer of frosting.
Healthy Smash Cake Recipe
Healthier smash cakes skip refined sugar and use mashed bananas or apple purée for sweetness. Almond flour or wholemeal flour, ripe bananas, eggs, and coconut oil are common picks.
Add cocoa powder for a chocolate twist or puréed strawberries for a fruit vibe. These alternatives bake in about 30 minutes and let you skip processed sugar, which some parents definitely prefer. Fruit brings enough natural sweetness for tiny taste buds anyway.
Creative Themed Designs
Rainbow cakes use colored buttercream layers or spatula-painted frosting. Just split your frosting into bowls, tint them, and go wild. Stack colorful layers or swipe different shades on the outside with a spatula.
Unicorn themes need pastel colors, gold details, and some fancy piping. Use Wilton tips like 1M for rosettes or 104 for ruffles. If you’re feeling fancy, add a white chocolate ganache drip. Honestly, it’s going to get destroyed anyway, so don’t stress about perfect piping.
Decorating and Assembling Smash Cakes
Assembling and frosting your cake well gives you a sturdy base for decorations. Picking the right toppings makes the cake look cute and keeps things safe for curious little hands.
Frosting Techniques
Layer your frosting for a clean look. Stick the first layer down with a dab of buttercream on your plate or board.
Spread filling on the first layer with the back of a spoon or spatula. Flip the top layer upside down so the flat part’s on top for a smooth finish.
If you don’t have pro tools, use a spoon in small circles to spread frosting. Heat it in hot water between swipes for a smoother texture.
Got a turntable and cake comb? Press the comb’s base against the board and spin for smooth sides. No fancy tools? A clean ruler works in a pinch.
Crumb Coating for Smooth Finishes
Crumb coats keep crumbs out of your final layer. Spread a thin layer of buttercream over the cake with an offset spatula.
Frost the top first, then go down the sides. Don’t worry if it’s not perfect—just cover every bit of cake.
Pop the crumb-coated cake in the fridge for 30 minutes. The frosting should feel firm, not sticky, so the cake doesn’t wobble while you decorate.
Add your final frosting layer generously. Let it hang over the edges, then smooth it around the sides with your tool of choice.
Topping and Theming Ideas
Sprinkles are by far the easiest way to decorate. Press them on while the frosting’s still soft, or they’ll bounce off everywhere. Hold the cake over a tray to save the extras.
Piped swirls give the cake some height and flair. Use a star tip and pipe little circles on top, pushing down slightly at each peak.
For a rustic look, gently drag your spatula up the side as you spin the cake, making spiral grooves.
Popular themes:
- Fresh berries for color and flavor
- Textured buttercream in soft pastels
- Minimal designs with smooth frosting and simple toppers
- Rainbow sprinkles for classic birthday vibes
Pick decorations that look good in photos and won’t be a choking risk for your baby.
Cake Smash Photography and Setup
Getting great cake smash photos isn’t just about the cake. You’ve got to plan, from timing to theme to cleanup. If you’re prepared, you’ll catch those big, joyful moments and keep your baby comfortable.
Planning the Session
Book your cake smash session a few weeks ahead so you’ll have the photos in time for the big day. Try to schedule in the morning, after a nap and snack—babies are usually happiest then.
Avoid naptime or mealtime. Most sessions take about 60 to 90 minutes and go in three stages: family portraits, cake smash, and a bubble bath cleanup.
Let your baby try a bit of plain cake before the shoot to see how they react. Some kids dive right in, others need a little encouragement. Tell your photographer about any allergies or dietary needs so they can plan around them.
Timing tips:
- Book 2-3 weeks before the birthday
- Go for morning sessions
- Plan for 1.5 hours total
- Avoid nap and meal times
Themes, Props, and Outfits
Simple setups with just a few props really keep the spotlight on your baby. When you go for a themed cake smash session, you can choose anything from a basic banner to a wild, elaborate set, but honestly, busy backgrounds can steal the show from your child’s face.
Classic pastels, rainbows, seasonal touches, or favourite characters all work as themes. I’d suggest picking just one or two colours for the backdrop, outfit, and cake—makes everything look pulled together but not overwhelming.
For clothes, grab a comfy nappy cover, romper, or something simple that fits the vibe and lets your baby move. Outfits with too many buttons or frills just get messy and uncomfortable when frosting gets everywhere.
Essential setup elements:
| Element | Purpose |
|---|---|
| Backdrop | Creates visual interest without distraction |
| Cake | 6-inch cake or giant cupcake works best |
| Outfit | Comfortable, theme-coordinating clothing |
| Props | Limited to 2-3 items maximum |
Safety and Clean-Up Tips
Keep the portrait part quick so your baby saves energy for the cake smash. If your little one hesitates with the cake, sit nearby and show them it’s okay—sometimes you’ve got to lead by example.
Some photographers tuck favourite snacks behind the cake or hand over a wooden spoon for those babies who just don’t like sticky fingers.
Afterwards, a bubble bath usually seals the deal—babies love it, and honestly, they might not want to get out. Bring towels, a change of clothes, and whatever comfort items help your kiddo wind down.
If you stay relaxed, your baby will pick up on it. Laugh, have fun, and they’ll probably jump right in—or maybe they’ll need a little nudge, and that’s fine too. Either way, you’ll get some great memories.
Storage, Serving, and Further Tips
Good storage keeps your cakes fresh for days. Smart serving tricks help every slice look pretty. If you handle common problems ahead of time, you’ll save yourself a headache.
Make-Ahead and Storage Guidelines
Bake regular cakes and smash cakes up to three days ahead, no problem. Unfrosted cakes last 2-3 days at room temperature if you stash them in an airtight container. Wrap them tight in cling film so they don’t dry out.
Frosted cakes stay fresh for 3-4 days at room temp since the frosting acts like a shield. Just keep them away from sunlight and heat. If you used cream cheese frosting, pop the cake in the fridge for a day or two and let it warm to room temperature before serving.
Want to make cake way in advance? Freeze unfrosted layers for up to three months. Wrap each one in cling film, then foil. Jot down the date so you don’t lose track.
Cakes with fresh fruit or custard need the fridge and only last 3-5 days. Those fillings spoil fast if you leave them out.
Serving Suggestions
Let refrigerated cakes sit out for an hour or two before serving—otherwise, they taste dense and the frosting goes hard.
Slice with a sharp knife dipped in hot water and wiped dry between cuts. You’ll get nice clean edges and won’t drag the frosting. For smash cakes, set them on a high chair tray or a big plate to catch the mess.
Give your baby their smash cake while everyone else enjoys the main cake. Let them explore and dig in, and keep a damp flannel close for speedy clean-up.
Troubleshooting Common Issues
Dry cake? You probably overbaked or didn’t wrap it well. Check your cake five minutes before the recipe says it’s done, and always store it wrapped up tight.
Crumbly texture? That’s usually too much flour or not enough liquid. Spoon flour into your measuring cup and level it off—don’t just scoop from the bag.
Frosting sliding off? Your cake might be too warm or the frosting too soft. Cool cakes fully before frosting and chill the whole thing for 15 minutes to help set it.
Sunken centre? Probably underbaked or you opened the oven too early. Don’t peek until the minimum time is up. Test it with a skewer in the middle to be sure.
Frequently Asked Questions
Parents planning their baby’s first birthday usually have the same handful of questions about smash cakes—timing, ingredients, and how to handle the mess. Most of it comes down to making things safe, fun, and photo-worthy without going overboard.
What are the recommended age and occasions for having a smash cake?
Smash cakes are for your baby’s first birthday. The sweet spot is 11 to 13 months, when your little one can actually get their hands in the cake.
Your baby should sit up on their own and want to feed themselves. That way, they’ll really get into it instead of just staring at the cake.
First birthdays are the big one, but you can also book cake smash photo sessions before or after the actual birthday. Some families split the party and the photos for less chaos.
How does a smash cake differ from a regular birthday cake in size and design?
Smash cakes are way smaller—usually four to six inches across. That looks just right in photos and won’t overwhelm your baby.
Stack two or three layers for some height. One layer just looks flat and, well, pancake-ish in pictures.
Let your baby have their own cake, and serve a bigger one to the guests. Some folks get matching designs so everything looks coordinated in photos.
Can you suggest suitable ingredients for a baby-friendly smash cake?
Try healthier stuff like bananas, Greek yoghurt, and maple syrup instead of regular sugar. You’ll get a cake that’s a bit like banana bread with a hint of cinnamon.
Swiss meringue buttercream makes a good frosting—it’s less sweet than the classic kind and has a smooth texture. It’s just sugar, egg whites, and butter.
Order a cupcake version of the smash cake a few weeks early to test for allergies. That gives you time to spot any issues before the big day.
I’d skip chocolate cake or icing. Dark brown frosting all over your baby’s face and clothes just doesn’t look great in pictures.
What are the top themes for a first birthday smash cake?
Popular themes? Pastels, rainbows, or soft neutrals that go with your photo backdrop. Animals, florals, or simple shapes work, too—kids love them.
Match your smash cake to your party decorations for a nice, pulled-together look. If your baby’s birthday is in winter, maybe snowflakes; spring babies get florals. You get the idea.
Character themes from kids’ shows are cute, but honestly, simple designs usually look better in photos. A swirl of buttercream and a single cake topper can be timeless.
How can one minimise the mess during a cake smash photography session?
Store the smash cake in the fridge, but pull it out the morning of your shoot. Room temp cake is softer and easier for little hands to smash up.
Keep the cake out of sunlight and in a cool, dry spot before serving. If you used lollies or gummies inside, don’t refrigerate unless it’s really warm in the room.
Put a plastic mat or washable backdrop under your baby. Dress them in a nappy or something you don’t mind getting ruined.
Have wet flannels and towels on standby. If you can, schedule the session right before bath time for an easy clean-up.
What are some creative alternatives to a traditional smash cake?
You could try a smash watermelon instead of cake for a healthier option. Just cut a small watermelon in half and let your baby dig right into the juicy fruit.
Cupcakes stacked in a little tower give your child more than one spot to smash. Plus, it makes for some pretty fun photos.
Doughnut stacks or cookies with icing can offer the same kind of messy excitement. They’re a solid pick if your baby can’t have certain ingredients.
Some families skip the sweets and go with colored play dough or sensory materials for the smash session. You avoid the sugar but still get those adorable, messy pictures.